🚀 Install from Chrome Web Store
The easiest and safest way to install ImmersityLens
🚀 Install from Chrome Web StoreClick "Install from Chrome Web Store"
This will take you to the official Chrome Web Store listing for ImmersityLens.
- Click the blue button above to visit the Chrome Web Store
- You'll see the official ImmersityLens extension page
- All Chrome Web Store installations are verified and secure
Add to Chrome
Install the extension with one click from the Chrome Web Store.
- Click the "Add to Chrome" button on the extension page
- Chrome will ask for permission confirmation
- Click "Add extension" to confirm the installation
- The extension will be automatically added to your browser
Pin the Extension
Make ImmersityLens easily accessible in your toolbar.
- Click the puzzle piece icon in Chrome's toolbar
- Find "ImmersityLens" in the extensions list
- Click the pin icon next to it
- The ImmersityLens icon will now appear in your toolbar
Ready to Go!
Your extension is now installed and ready for setup.
- Proceed to the "Subscription Setup" tab to configure your API credentials
- The extension starts in disabled mode for your privacy
- You'll need an active Immersity AI subscription to use conversion features
⚠️ Chrome Web Store Troubleshooting
- Extension not found: Make sure you're using the correct Chrome Web Store link
- Can't install: Check that you're using a supported version of Chrome
- Installation blocked: Some corporate networks block extension installations
- Need manual installation: Use the "Manual Installation" tab as a fallback
Get Immersity AI Subscription
Before using ImmersityLens, you need an active subscription to Immersity AI.
- Visit Immersity AI Pricing
- Choose a subscription plan that suits your needs
- Complete the registration and payment process
- Save your API credentials for the next step
Configure API Credentials
Enter your Immersity AI subscription credentials in the extension.
- After installing the extension (see Manual Installation tab)
- Click the ImmersityLens icon in your browser toolbar
- Enter your Immersity AI API key in the popup
- Click "Save" to store your credentials securely
Verify Subscription Status
Ensure your subscription is active and working properly.
- The extension popup will show your subscription status
- Green indicator means your subscription is active
- Red indicator means there's an issue with your credentials or subscription
- Contact Immersity AI support if you encounter issues
⚠️ Subscription Troubleshooting
- Invalid API Key: Double-check your credentials from Immersity AI dashboard
- Subscription Expired: Renew your subscription at Immersity AI
- Usage Limits: Check if you've exceeded your plan's monthly conversion limits
- Network Issues: Ensure stable internet connection for API communication
📦 Manual Installation
Alternative installation method if Chrome Web Store is unavailable
📦 Download Extension (v4.1.20)⚠️ We recommend installing from Chrome Web Store for automatic updates and security
Download & Extract
Download the extension zip file and extract it to a folder on your computer.
- Click the download button above
- Extract the zip file to a permanent location (don't delete this folder)
- Remember the folder location - you'll need it in the next step
Open Chrome Extensions
Navigate to Chrome's extension management page.
- Open Google Chrome
- Type
chrome://extensions/in the address bar - Or go to Menu → More Tools → Extensions
Enable Developer Mode
Turn on Developer Mode to install unpacked extensions.
- Look for the "Developer mode" toggle in the top-right corner
- Click to enable it
- New buttons will appear: "Load unpacked", "Pack extension", etc.
Load the Extension
Install ImmersityLens by loading the unpacked extension.
- Click the "Load unpacked" button
- Navigate to the folder where you extracted the extension
- Select the folder and click "Select Folder"
- ImmersityLens should now appear in your extensions list
Pin the Extension
Pin ImmersityLens to your toolbar for easy access.
- Click the puzzle piece icon in Chrome's toolbar
- Find "ImmersityLens" in the list
- Click the pin icon next to it
- The extension icon will now appear in your toolbar
Development Setup
For developers who want to modify or contribute to ImmersityLens.
- Clone or download the repository
- The extension uses Manifest V3
- Main files:
content.js,popup.js,background.js,manifest.json - Dependencies are included in the
libs/folder
File Structure
Understanding the extension architecture:
content.js- Main extension logic and image detectionpopup.js/html- Extension popup interface with animation selectionbackground.js- Background script for context menu handlinglibs/- LIF processing libraries and 3D viewer componentsshaders/- WebGL shaders for 3D rendering and effectsicons/- Extension icons in different sizes
Testing Guidelines
Key sites and scenarios to test when developing:
- CNN.com - Tests picture element compatibility
- Instagram-style layouts - Tests padding-based aspect ratios
- Google Images - Tests various responsive patterns
- CORS handling - Test on both protected and open domains
Finding Convertible Images
ImmersityLens adds context menu options to all images on web pages.
- Visit any website with images
- Right-click on any image to see conversion options
- Images larger than 100x100 pixels are recommended for best results
- The extension works universally on most websites with images
Converting Images
Transform 2D images into immersive 3D experiences using AI.
- Right-click on any image and select "Generate LIF"
- The AI conversion process will start automatically
- Processing includes: Outpainting → Depth Estimation → LDI Generation
- Wait for the conversion to complete (usually 30-60 seconds)
- Monitor progress through the extension popup
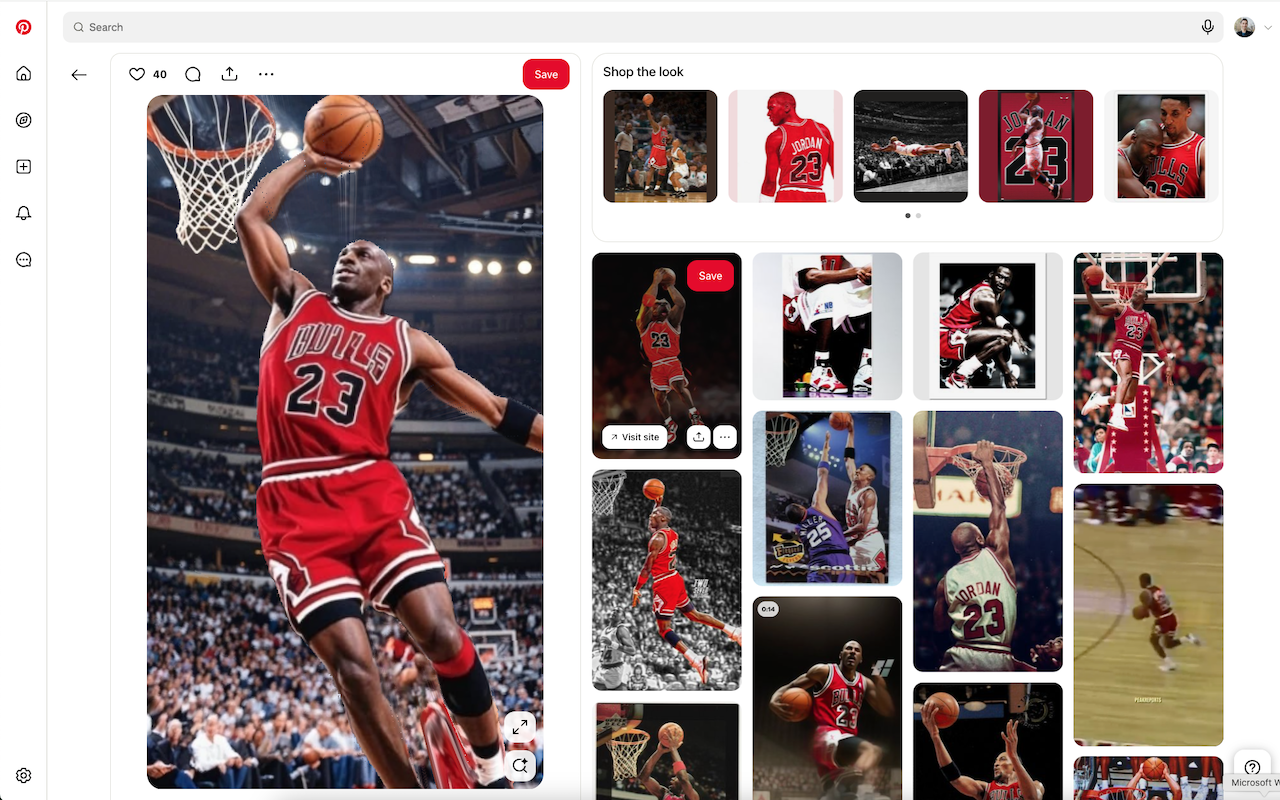
Viewing 3D Results
Experience interactive 3D images with mouse controls and animation selection.
- Once converted, hover your mouse over the image
- Move your mouse to see the 3D parallax effect
- The image will respond with realistic depth and movement
- Use the extension popup to select different animation styles (Zoom In, Ken Burns, etc.)
- Changes take effect immediately for the active image
Downloading & Exporting
Save your 3D images in multiple formats for sharing and viewing.
- Right-click on converted images for download options
- Download LIF: Save the original Leia Image Format file
- Download MP4: Export as video with your selected animation
- LIF files work with compatible 3D viewers and displays
- MP4 files can be shared anywhere as standard videos
- Both formats preserve the 3D effect for different use cases
VR & WebXR Experience
Experience your 3D images in virtual reality for ultimate immersion.
- Use a VR-compatible browser (Chrome, Firefox, or Edge)
- Right-click on converted images and select "Open in VR"
- Put on your VR headset for a fully immersive 3D experience
- Compatible with Oculus, HTC Vive, and other WebXR devices
- Move your head around to explore the 3D scene naturally
- VR mode provides the most impressive depth experience
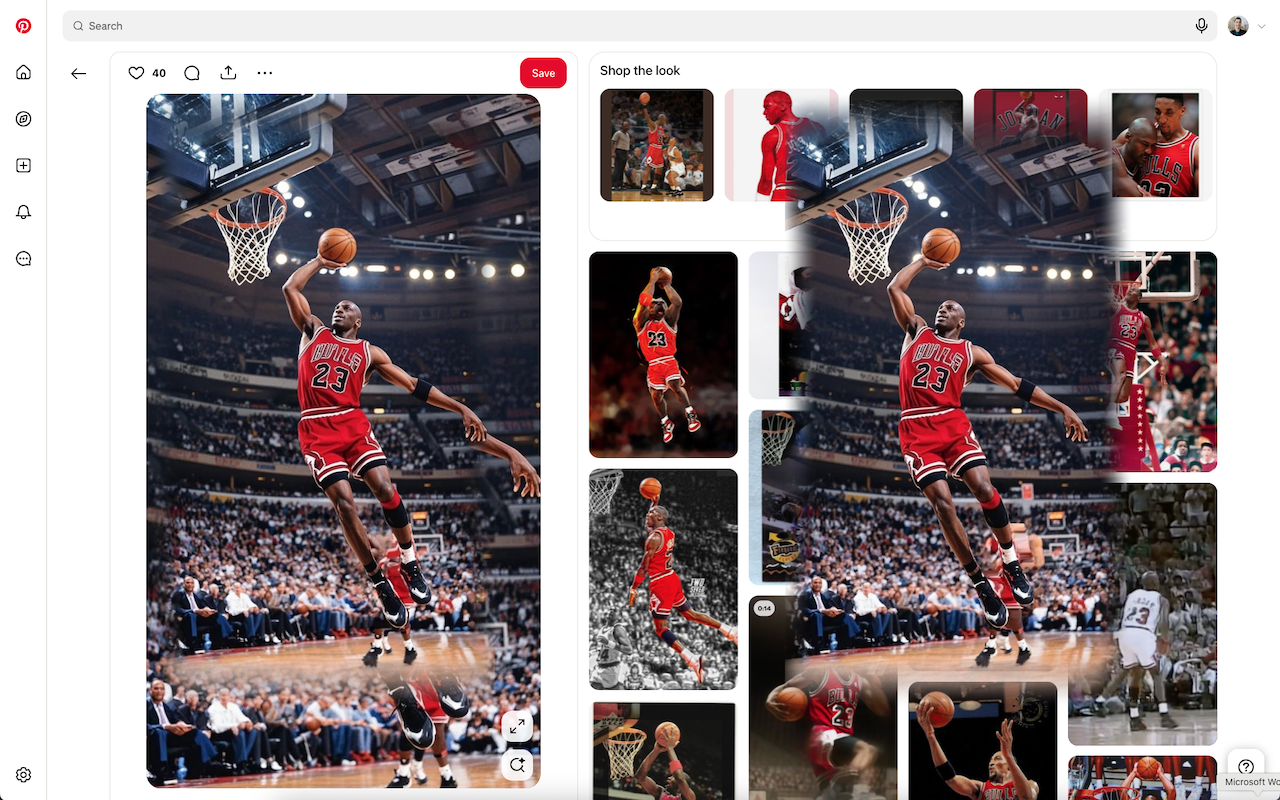
Complete Workflow Example
Here's the full magical journey from start to finish:
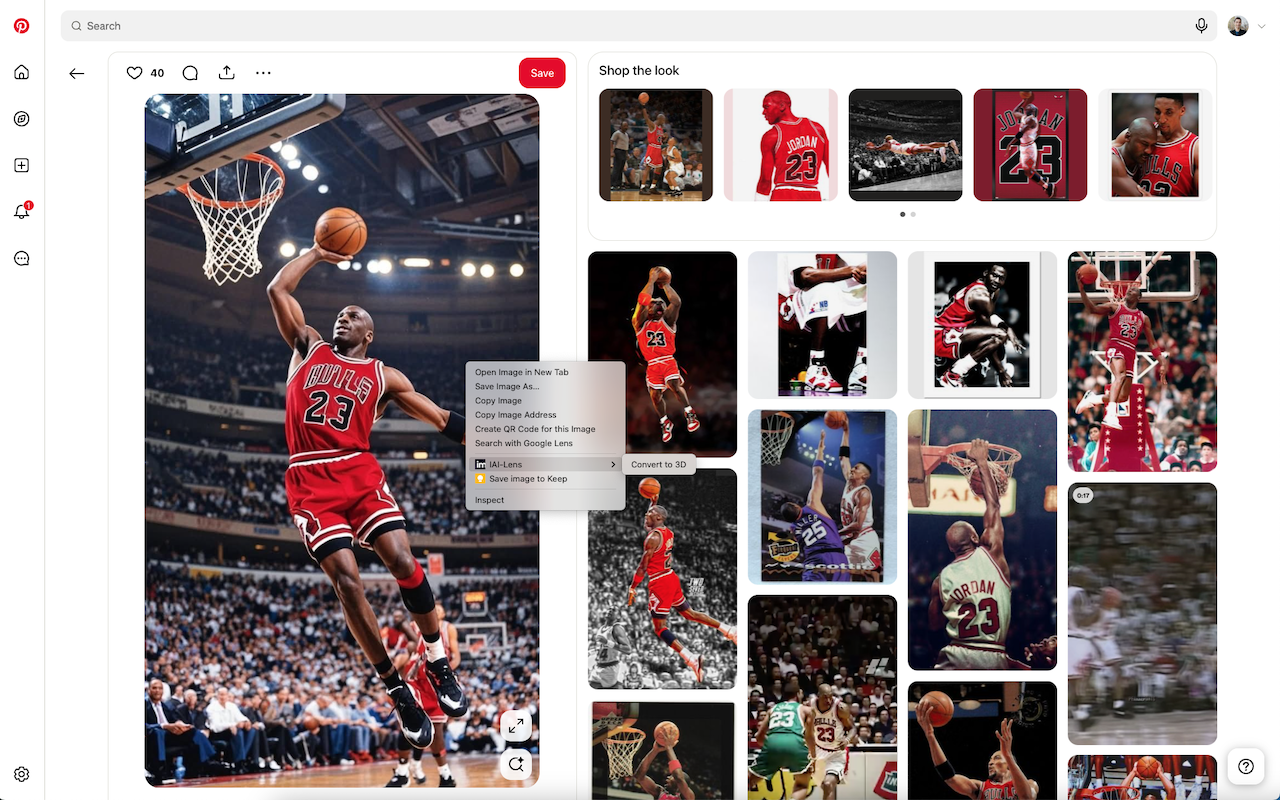
🚀 Step 1: Right click on any image and select "Convert to 3D" to start the conversion
✨ Step 2: An interactive Canvas appears and lets you interact with the 3D image
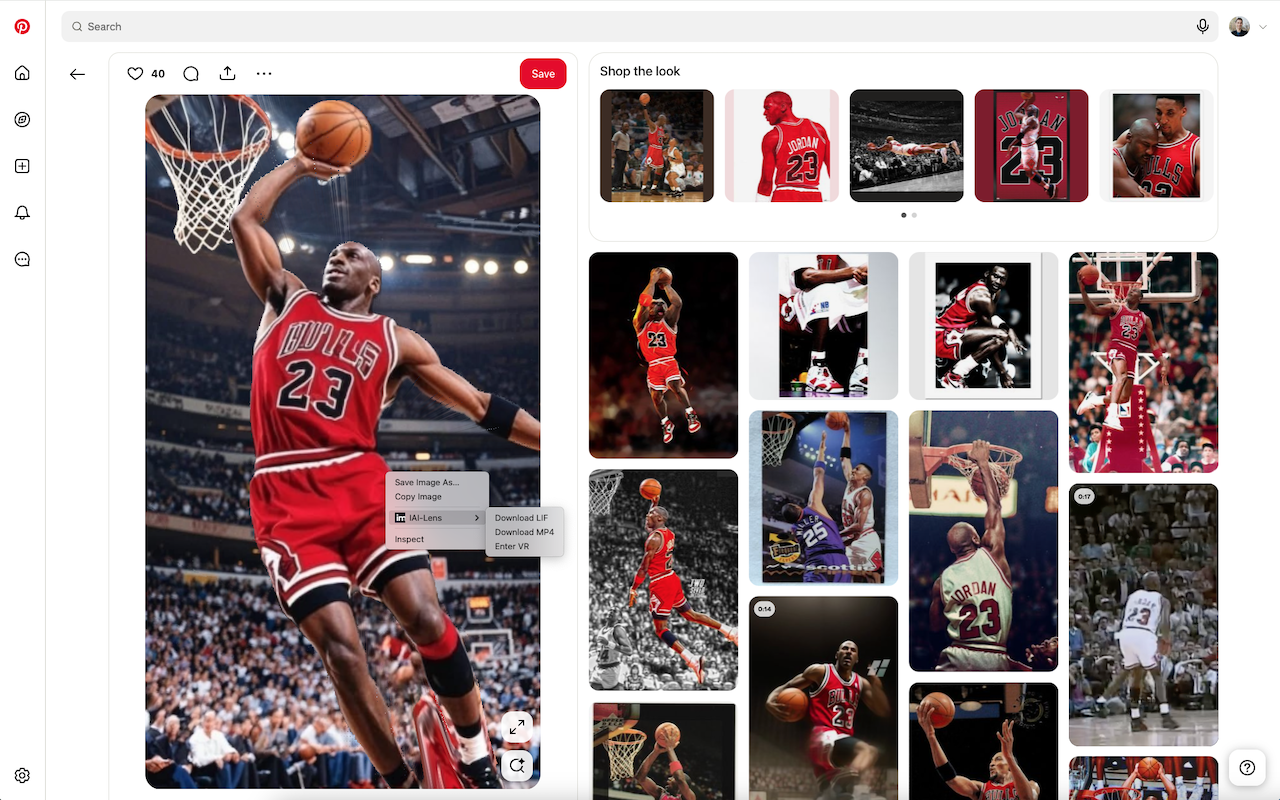
💾 Step 3: Download the 3D image as LIF file or export as MP4 animation
🥽 Step 4: View the 3D image in VR or 3D Screen
⚠️ Troubleshooting
- Context menu not appearing: Ensure the extension is enabled and you're right-clicking on an image
- Conversion fails: Check your Immersity AI subscription status and API credentials
- 3D effect not working: Make sure your browser supports WebGL and hardware acceleration is enabled
- Animation not responding to mouse: Some images may be covered by overlay elements - try different images
- Download not working: Check your browser's download settings and popup blockers
- VR mode issues: Ensure you have a WebXR-compatible browser and VR device
- MP4 export problems: Wait for LIF conversion to complete before attempting MP4 export
- Subscription issues: Verify your API key and subscription status in the extension popup